
Eat a Gulf Island
RED RED: Roasted Cherry Tomatoes and Hour-Pickled Red Onions
There’s a wonderful haiku by Basho:
red red
the sun goes down
in autumn winds
I saw this haiku inscribed on a stone at the base of Autumn Colour Hill, in Kenrokuen Garden in Kanazawa, Japan. Basho wrote it there in 1689, as part of his Narrow Road to the Deep North series. This haiku suggests the red sun and the red leaves in the wind, with connotations of sunset and autumn. So here’s RED RED, two seasonal red foods to eat. And you can eat the red cherry tomatoes and the red onions together.
Roasted Cherry Tomatoes
Fresh cherry tomatoes are divine, and roasting them intensifies their sweetness and flavour. I want them in my garden, knowing that more than 80% of tomato varieties disappeared in the 20th century. There is time for cherry tomatoes to ripen on the vine even if autumn is cold and rainy, and you may have more than you can eat. Roasting them is easy, and you can do it an hour. Spread them on a parchment-covered baking sheet and preheat the oven to 350. Drizzle them with olive oil and sprinkle them with with salt. If you’re a garlic fan, add some garlic powder. Roast them for an hour, turning them midway. The tomatoes will burst and soften. They keep in the fridge, and you can serve them as is, or add them to any tomato dish.
Hour-Pickled Red Onions
You can pickle red onion slices, removing the raw taste and making them much tastier, in the same amount of time as it takes to roast cherry tomatoes: one hour. I find that 1 part vinegar to 2 parts water is good when you eat the red onions without rinsing them, fitting them in your sandwich or mixing them into any salad. Use a litre glass jar with a lid; fill with boiling water to clean it.
Slice one red onion: see How to Cut a Red Onion into Rainbows below. Place in the rinsed jar. Put 1/3 cup vinegar and 2/3 cup water in a pot with 1 tsp. salt and 1 tblsp. sugar. OPTIONAL: If you like it spicy, add chili pepper or fennel seeds. If you want a Middle Eastern touch, add a teaspoon of sumac. Bring to a boil to dissolve the salt, and then remove from the heat. When it’s no longer scalding but still warm, pour it over the onions in the jar. If you need a bit more liquid to cover them, you can add more cold vinegar and water in the same 1:2 ratio. Place the lid on and let it cool before putting it in the fridge. Ready in an hour, and keeps in the fridge for a week.


How to Cut a Red Onion into Rainbows
1. Cut a small piece off each end.
2. Cut the onion in half, and then cut each side in half.
3. Peel the quarters.
4. Place each quarter onion on its flat side on the board. Check to see the concentric circle rainbow is right side up.
5. Slice as thin or thick as you feel like.


Roasted Red Peppers & Red Rose Omelette
I first tasted roasted red bell peppers in Dubrovnik, and friends from the former Yugoslavia taught me how to prepare them. Sweet red peppers are blackened on a grill or under a broiler and the skins are peeled off: the flesh of the red peppers beneath is soft, smoky, and sweet. They have none of the metallic or slimy qualities of green bell peppers. Peppers are available from the garden in late summer and fall, and the hot-houses here produce bell peppers in spring and late fall too. Theoretically, roasted red peppers keep for a long time in enough olive oil, but mine are eaten quickly. They bring a lot of flavour to eggs and to white fish like sole or cod, and to bland grains like quinoa.
Roasted Red Peppers
3 or four red bell peppers
dressing: A bit of lemon, olive oil, salt, oregano, smoked paprika or chili powder
Cut peppers in halves or thirds. Arrange them skin-side up on a parchment-covered baking sheet, and press them down to flatten them a bit. Place them under a broiler (or on a barbecue grill if you have it.) There will be a nice smell of roasting. Remove the pepper pieces when they are truly blackened. With a spatula, lift each into a wide bowl or pot. You cover it with a lid or plate (never plastic wrap) so the pepper skins will start to steam off. Get ready your cutting board, a fork, and a paring knife, and spread out some paper or a bag to discard the skins. Prepare a container with a tablespoon of lemon juice and of olive oil, a bit of salt, and a sprinkling of dried oregano and smoked paprika or chili pepper. Take out 1-2 pepper pieces at a time, placing them on your board, and covering the bowl again. Use the fork to hold down one end of the pepper, and the knife to peel back the skin, which you’ll discard. Cut the piece into long strips and place them in the container. As you add more, stir up the strips in the dressing. Enjoy these peppers as you surely would in southeastern Europe!
Red Rose Omelette
4 eggs
½ cup water
salt, pepper, powdered garlic
about 3 roasted red peppers in strips
Mix your eggs with the water, salt, pepper, and garlic. Thoroughly oil the bottom and sides of your (oven-proof) cast iron frying pan, and heat it on the stove. Pour in the egg mix. Turn it down to medium and cover the pan. Turn on your oven to broil for later. When the omelette barely firms up at the edges and just begins to come together in the middle, remove the pan and place it on your counter. Using your fingers to grab one roasted red pepper strip at a time, place them around the pan in concentric circles, starting from the outer edge. Careful of the hot pan. You are creating a red rose pattern from the outside in. With a pot-holder, grab the pan and place under the broiler. As soon as the top starts to brown a bit, take it out. Loosen it all around as much as possible with a flexible spatula. Don't flip or fold it because the red rose design is on top! Place your big serving plate beside it. You may be able to use two metal or silicone spatulas to coax the whole round onto the plate. (If not, admire the red rose, then cut it in half or thirds in the pan.) Serves 2 or 3.


Tabouli Variety
tabouli with bulgur wheat, carrots, & avocado
tabouli with farro, tomatoes, & olives
tabouli with couscous, kohlrabi, & lemon
Tabouli is a delicious salad, made with your choice and combo of fresh parsley or mint, and it’s tasty with various types of wheat. In France, tabouli is couscous with a sprinkle of parsley, but I make it as green as possible. Curly and flat parsley are both good, but flat parsley is easier to chop, and less likely to stick in your throat. Curly parsley is in every market, and I grow flat parsley. You can serve tabouli on its own, or as a topping on a lettuce or tomato salad. I’ll tell you about 3 different grain types you can use. You can mix and match the vegetables I’ve suggested with different grains.
Kohlrabi is a great addition to tabouli; it’s light and crunchy and always needs only salt, lemon, and olive oil to complement its flavour. If you find it in the market, choose a small one, since younger kohlrabi is likely to be crisp and never woody. If you grow it in your garden, you appreciate the weird sputnik ball that looks like a root vegetable but balloons right out of the stem, and shoots out its loose cabbagey leaves. It’s a drama queen with chartreuse or purple skin.
tabouli with bulgur wheat, carrots, & avocado
½ cup bulgur wheat
1 cup water
dash of salt
fresh parsley and mint leaves (no stems), half a bunch
each, or one whole bunch of either
1 big carrot or 2 very small
½ to 1 avocado
1 green onion
lemon & olive oil
Bulgur is cracked wheat berries, so it cooks fast, but has a chewy texture. If you have medium size bulgur, pour 1 cup boiling water and a bit of salt over ½ cup bulgur wheat in a pot. Cover and cook on low 15 minutes, or until the water is mostly absorbed. (If it's very fine grains, it will cook off the heat.) Remove from heat, let it rest covered for a few minutes, then uncovered. With a fork, lightly stir in 1 tblsp. olive oil until the grains separate, then trowel it onto a plate to cool completely. Strip the stems off the parsley and mint, wash it, dry it, then roll it in a dishtowel to absorb any more water. To chop it, you can use a blender, in stages, or a sharp-bladed food processor, or your best chef’s knife. Peel and cut into chunks the carrots and avocado and slice the green onion finely. Squeeze lemon juice over them in a bowl. When the bulgur is cool, mix it into the vegetables. Mix in the parsley and mint last. Adjust the salt and lemon and oil by adding more if needed.
tabouli with farro, tomatoes, & olives
½ cup farro grains
a few cups of water
dash of salt
fresh parsley and mint leaves (no stems), half a bunch
each, or one whole bunch of either
tomatoes of any kind
a handful of green olives
1 green onion
lemon & olive oil
Farro is a whole grain, so you can shorten the cooking time if you soak it in cold water all day or overnight. After it’s soaked, put it in a pot ¾ full of salted water, and cook it at least an hour. Taste a few grains to see if they’re firm but soft enough to chew; some will start to come apart. When they’re done, pour the batch in a strainer and run cold water through them to separate the grains and get rid of cloudy bits. Let the farro dry on a plate. Farro is dense so you may want to use just part of this amount. With a fork, lightly stir 1 tblsp. olive oil through the grains. Strip the stems off the parsley and mint, wash it, dry it, then roll it in a dishtowel to absorb any more water. To chop it, you can use a blender, in stages, or a sharp-bladed food processor, or your best chef’s knife. Chop the tomatoes; halve cherry tomatoes. Chop the olives too. Slice the green onion finely. Squeeze lemon juice over them in a bowl. Mix the farro with the vegetables. Mix in the parsley and mint last. Adjust the salt and lemon and oil by adding more if needed.
tabouli with couscous, kohlrabi, & lemon
½ cup white or whole wheat couscous
½ cup water
dash of salt
fresh parsley and mint leaves (no stems), half a bunch
each, or one whole bunch of either
1 kohlrabi
1 green onion
optional: preserved lemon, or grated organic lemon rind
lemon & olive oil
Couscous is soft and easy to eat, and doesn’t need to be cooked. Pour the same amount of boiling water on the couscous in a bowl, cover it, and fetch it 15 minutes later. Uncover it and let it cool. It’s With a fork, lightly stir 1 tblsp. olive oil through the grains. Strip the stems off the parsley and mint, wash it, dry it, then roll it in a dishtowel to absorb any more water. To chop it, you can use a blender, in stages, or a sharp-bladed food processor, or your best chef’s knife. Cut and discard all the peel off the kohlrabi with a sharp knife, and then cut the ball into thin batons, or go further and chop it up. Slice the green onion finely. Squeeze lemon juice over them in a bowl. Mix the couscous with the vegetables, then add the parsley and mint. To enhance the lemon flavour, take some preserved lemon, rinse it, chop it very small and add it, OR add some finely grated lemon rind. Adjust the salt and lemon and oil by adding more if needed.


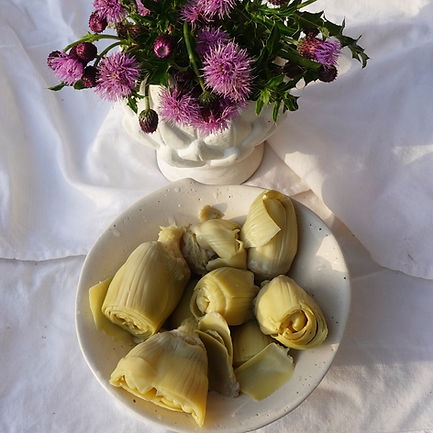
Thistle Fritters
My prized cookbook when I was a teenager was "The Thistle Eaters Guide" by R. E. Scammel. It has recipes for artichokes as the ingredient in every conceivable food group. Thistles are a big family including the small-flowered Scotch and Canada thistles, and Milk Thistle –an herbal detoxifier for heavy drinkers – and the huge Bull Thistle with dangerous spiny wings up its stem, and the Cardoon – whose stalks are generally concealed in a creamy gratin eaten in Europe. And there’s my favourite vegetable – the Artichoke. California grows enough of them to have artichoke festivals. There, artichokes are boiled whole and eaten in a seductive style: you scrape each bract with your teeth to get the bit of soft heart at the tip. Then you discard the choke (the pointy central thistle), and eat the saucer-shaped heart or the young bud with baby leaves. There are plenty of Spanish and Italian artichoke hearts packed in water in tins or marinated in oil in jars. It’s better to use the water-packed, but if you can find only the ones marinated in oil, rinse them off thoroughly, and you can use them to make thistle fritters.
1 can whole or quartered artichoke hearts in water
1 egg
½ cup flour
½ tsp. baking soda
½ cup water or beer
1 diced shallot or ½ red onion
a palmful of fresh parsley or cilantro or basil, chopped
mild oil for frying
mayonnaise or a lemon-based dip or salsa or latke sides
Rinse the artichokes well and squeeze them out. The next steps you can do by hand or in a food processor. BY HAND: chop or dice the artichokes, then the onion, and parsley/cilantro/basil. Beat the egg in a big bowl, then add in the flour and baking soda, then the water or beer, mixing til smooth. Stir in the artichokes and chopped herbs. IN THE FOOD PROCESSOR: Buzz the artichokes into bits, then the onion and parsley/cilantro/basil. Add to this mixture the egg, flour, soda, and water and combine lightly.
Oil your frying pan and heat it on medium. Drop into the pan about 2 tablespoons of mixture for each fritter; you can fry 3 at once. These are much smaller than pancakes. Cook these little fritters for a few minutes, flip them over and cook the other side, for a total cooking time of 5 minutes. You’ll have about a dozen. Serve them with a dip or salsa on the side, or eat them with the usual accompaniments for latkes. Leftovers are best served reheated.
Variation: If you’re a cheesehead, add 2 tblsp. grated hard cheese, like Parmesan, Gouda, or Swiss.


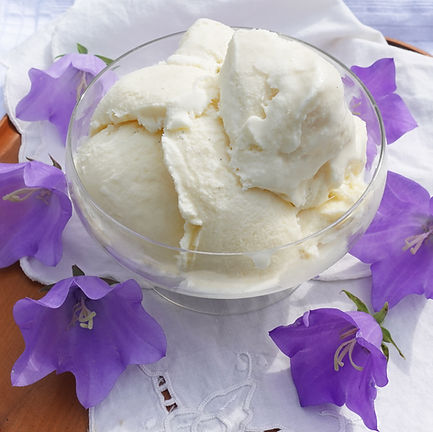
Odesa Ice Cream
This is the most delicious ice cream I’ve ever tasted and the easiest to make. In 1869 Mark Twain traveled to Odesa, then part of Russia, now a besieged city in Ukraine. He wrote in "Innocents Abroad" that Odesa looked just like an American city, he described its wonderful houses and streets and trees, and he ended his trip with an “ice cream debauch”. I was inspired by Caroline Eden’s account of her travels, her visit to Odesa ("Black Sea: Dispatches and Recipes", 2018) and I adapted her ice cream recipe. You don’t need an ice cream maker to freeze it! Three ingredients, no eggs or custard.
Calculations: Your ingredients may come in different size containers – no problem. With a measuring cup, pour 16 ounces (2 cups) of cream into your bowl. Then pour 10 ounces of condensed sweetened milk. Or use a ratio of about 2/3 cream to 1/3 condensed milk. This recipe serves four generously. You can halve it.
ingredients:
1.whipping cream – I use a 473 ml. carton (470g) 2.sweetened condensed milk – I use a 300 ml. can (298g)
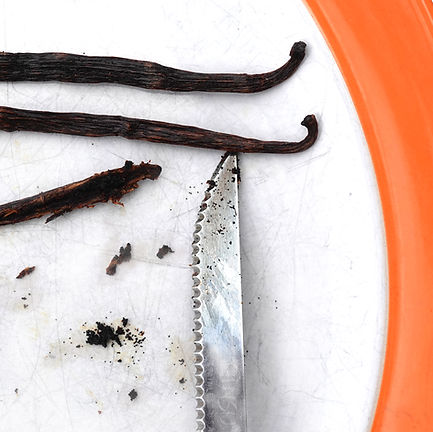
3.up to 2 tblsp. flavouring essence – I tend to use vanilla extract + orange liqueur. You can also use rum or any liqueur.
optional: some seeds from a split vanilla pod
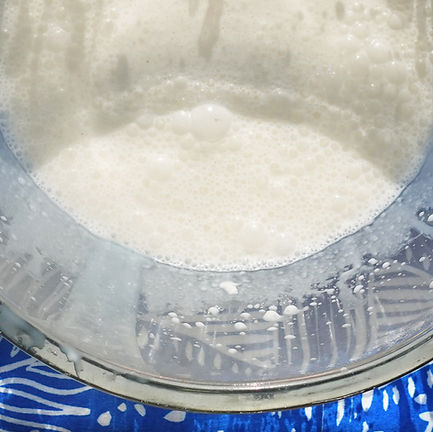
Whip all ingredients with an electric mixer - I use one beater - until it just begins to thicken. There will be lots of bubbles and creamy bits. Do not beat the cream into peaks. (And do not make butter, as my mother used to tell me when I was an energetic teenager given the task of whipping cream.) Pour it into one or two shallow steel bowls or pans. Cover lightly. Freeze for at least 5 hours. All day or overnight is easy.
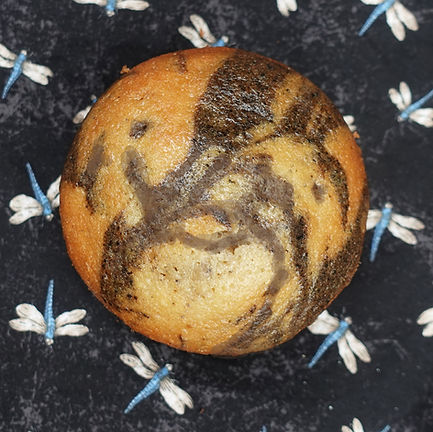
Black Sesame Marbled Muffins
makes 1 loaf pan or 6 giant muffins
Think of a barista creating cappuccino milk designs, think of marbling paper, think of feathering frosting. You can marble your muffins (or loaf cake) in a beautiful black and white pattern.
ingredients:
3 tblsp. whole black sesame seeds OR
2 tblsp. pre-ground black sesame seeds
1 tsp. cinnamon
1 tsp. ground anise seeds
½ tps. ground cloves
½ cup white sugar
1/4 cup mild oil (such as grapeseed, coconut)
2 tsp. vanilla
2 eggs
1 cup dairy or nondairy milk
1 ½ cups white unbleached flour
1 tsp. baking soda
1 tsp. baking powder or cream of tartar
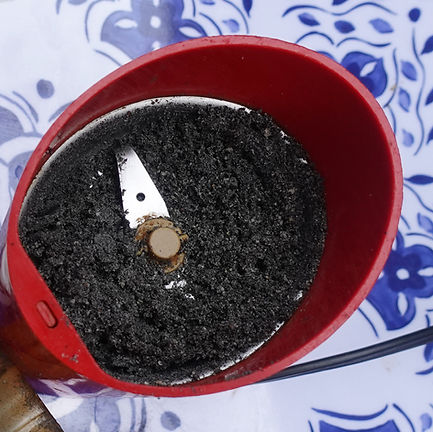
Preheat oven to 350. If you can buy ground black sesame seeds, great. OR grind black sesame seeds in your electric spice/coffee grinder. Place 1 ½ tblsp. seeds in it, grind once, open and scrape down with the tip of a knife, grind again. Scoop out and grind 1 ½ more tblsp. seeds the same way. Place seeds in a bowl and stir in cinnamon, anise, and cloves til well incorporated.
In another bowl, beat sugar and oil til smooth. Add eggs and continue beating. Add milk and vanilla til it is well blended. Mix in flour, baking soda, and baking powder. Remove about half of this batter to another bowl, or a measuring cup, as you will need about 1 cup of black batter. Slowly, in three pours, mixing it well with a spoon each time, add this batter to the sesame seed bowl. It should be an even colour – specifically a chocolatey brown (not black).
Oil a loaf pan or 6 large muffin tins. Pour and spoon about half the white batter into the pan or in each muffin hole. Add random stripes of black batter. Insert a knife down and across the stripes to make chevron designs. In a muffin tin, swirl your knife. Then pour in the rest of the white batter. Stripe or swirl the remaining black on top for a marbled effect.
For a loaf pan, bake 40-45 minutes; for muffins bake 35 minutes. Test with a toothpick to be sure the centre is done. Cool at least 15 minutes before slicing.


The Tree Cake
To celebrate a birthday or holiday, it’s fun to have a special occasion cake – like something simple in the shape of an angel or a jet or a TREE. I have a 50-year-old book, "Baker’s Cut-Up Cake Party Book" that reveals how to cut one 7-9” square cake into a tree, and I’ll share the secret pattern and directions with you. You can bake any square cake: my Orange Honey Cake (here), my gingerbread cake (previously posted), a chocolate cake. When you assemble the bare cake pieces, you can display already-cut servings, or use frosting/icing to stick the pieces together and cover the top. For a Christmas Tree Cake, I was overly generous with sprinkles. You could invite kids to top the frosting with candy-coated chocolates and silver dragees and gummy candies and little candles on the outer points.
How to Make The Tree Cake - with minimal math
-
Check out the orange tree diagram. Here’s the easiest way to cut your cooled 7-9” square cake. (Of course, for a big party, you could size up the tree by baking a bigger square cake.) Draw this pattern to your pan size on paper and cut out the pieces. Place them on top of your cake. If your cake edges are a bit ragged, slice them finer. Cut your cooled cake with a serrated knife, starting by halving it into 2 rectangles.
-
In the top rectangle, separate triangle A from B.
-
Divide the right corner into two triangles.
-
Minimal math: (Math haters just use the paper pattern.) In the bottom rectangle, the lowest points of triangles E and G are at the midpoints of the sides. E and G are two right angle triangles, so the length at the top and sides is the same.
-
As you lift the pieces out, arrange them on a long platter according to the green tree diagram.
-
You can cut off a bit of the top of B so it fits against A. Rotate C and D so they form the long rectangular trunk. Rotate E and G so the right angles fit snugly against the cut-off sides of F.
-
If you want to glue the shapes, spread frosting/icing between the shapes, then press them together. Frost/ice all over the surface of the tree. Without frosting, you could throw colourful sprinkles on it. First brush the surface with some honey + water so the sprinkles stick better.
-
If you want guests to help themselves easily, make a few more cuts into individual servings and separate the pieces slightly, maintaining the whole shape. Your wonky tree will still be there!


Orange Honey Cake
"Honey Cookery" is a slim volume by Ambrose Heath, published in London 70 years ago. He dedicates it to “my honey”. His recipes include measurements like “a breakfastcupful of cream” and “three dessertspoonfuls of butter”. I like the concept of his Orange Honey Cake because it is sweetened only with honey. I transformed it to fit the model of another old recipe: a chocolate cake with no eggs, no dairy, and no sugar. I made that one as a teenager because it rises magically when you add vinegar just before you bake it. It’s all handmade, no mixer needed. So here is my Orange Honey Cake, (no chocolate included). Easy enough for a teenager to make, delicious and not too sweet. The dry ingredients and the wet ingredients are assembled separately.
dry ingredients:
1 3/4 cups all-purpose flour
1 tsp. baking powder
1 tsp. baking soda
pinch salt
wet ingredients:
grated rind of one organic orange
juice of that orange + cold water to make ¾ cup
¼ cup vegetable oil
¾ cup honey
1 tsp. vanilla extract or orange liqueur
last-minute ingredient:
1 tbsp. apple cider vinegar
Preheat oven to 325˚F. Line a 7-9” square pan with a big piece of parchment paper or brown paper. Don’t cut the corners; just roughly push and fold the paper inward.
Combine dry ingredients in a mixing bowl.
Grate all the rind of the organic orange and add to the bowl. Then juice the orange, put it in your measuring cup and add enough cold water to make ¾ cup liquid. Mix it into the bowl.
Put the oil, then the honey, in your measuring cup. Top it with the vanilla or orange liqueur. Mix that well into the bowl.
Pour this batter into the parchment-lined pan.
Add a tablespoon of vinegar, and stir it around only briefly. White streaks swirl as the vinegar reacts with the bicarbonate and the cake starts to rise. Immediately put it in the oven and bake it about 40 minutes or until a toothpick comes out clean.
When it’s cool, lift it by the paper out of the pan. Flip it, peel off the paper, then turn it over. You can cut it into 8 or 9 servings, OR you can cut it into a TREE CAKE.
green tree frosting options:
Colour your frosting light green with matcha powder or spinach juice, and sweeten it with honey. Softened cream cheese makes a perfect luscious frosting. (200 grams is more than enough.) Spread it out on a dinner plate. Over it, sprinkle a teaspoon of matcha powder and drizzle lines of honey. Using a fork, mix and mash it all together until it’s a blended soft green. Taste it and add as much more matcha and honey as you like. OR Quickly steam some spinach leaves til bright green, strain under very cold water, and press down. Place a handful of this spinach in a cloth or a paper coffee filter and squeeze out the juice onto the cream cheese. (It doesn’t give it a vegetable flavour.) Add honey to sweeten.
