Eat a Gulf Island
Good food! Living on a southern gulf island in the Salish Sea, I have been lucky enough to grow many vegetables and fruits, and to have access to fresh fish. In a lifetime of enjoying cooking, I have also created lots of recipes. Many are vegetarian or vegan. Years ago, as the editor of the Slow Food Vancouver newsletter, I began to write down my best recipes so other people could make them, too.
CLICK on the name here of the recipe to go directly to it.
Good Night Baguettes
yield: 3 baguettes or 4 hero buns
I don’t live near a bakery in France, but I’d like a fresh baguette in the morning. The secret I got from a French baker is that it is simple to make bread at home – no kneading, no special pan, no gram scale, no sourdough. Women all over the world make bread at home every day. Making these baguettes requires a few minutes before you go to bed, and about 30 minutes when you wake up. You don’t knead it, you just let it rest. You can avoid any handling of the dough. This always turns out bread that has a crisp crust which does not shatter. Inside it has a chewy, holey crumb. This is white bread with character. I prefer more taste and nutrition, so I always use part whole wheat. You use a bench scraper as a shaping tool. With a bit of practice, you become better and faster. This baguette size is like a ficelle - a slender baguette, and it fits on your baking sheet. A bonus is that, unlike a bakery baguette, this does not get stale in one day. Both variations – walnut baguettes or green olive baguettes – are easy and wonderful. I like a baguette for breakfast. The long and wide buns are better split horizontally and piled with sandwich fillings for lunch.
475 g. flour (= 4 cups white flour
OR 3 cups white flour plus 1 cup whole wheat or rye or mixed flour)
365ml. or 13 oz. water + a bit more
½ tsp. active dry instant yeast
1 scant tsp. salt
optional rock salt for the top
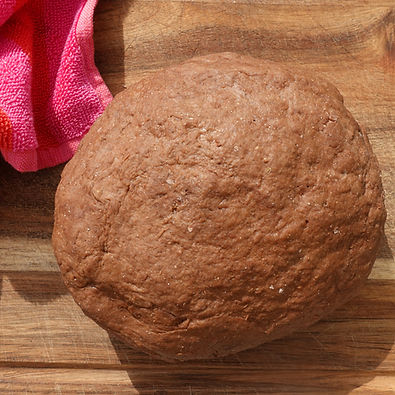
Before bed: Mix ingredients in a bowl with a big spoon until the dough comes together and doesn’t stick on the sides. If you included whole wheat flour, it is denser, so add a few more tblsp. of water. The dough will be sticky (high hydration). Cover the dough and let it rest for half an hour. Leave your spoon or silicon scraper in a cup of water. Come back before you go to bed. Now you can wet your spoon/scraper OR wet your hand. Pull up a stretch of dough from the base of one side of this round clock, stretch it up, across, and over top of the dough ball. Repeat 6 or 8 times going round the clock. Cover bowl overnight with plastic and wrap it in a towel. Good night baguette.
Good morning:
Preheat oven to 425. Place a pan of water in the bottom of the oven to create steam. Flour the counter lightly. Prepare one parchment-covered baking sheet pan, or a double-sized sheet pan. You do not need to rise the dough again.
Scoop dough ball around the edges with a spoon or silicon scraper toward the centre. You don’t want to mash all those air bubbles. Plop it onto the floured counter, and sprinkle a bit of flour on top. Use a bench scraper to cut dough cleanly in three pieces or four pieces. Push them over to the counter edge. Use the scraper to stretch out and shape each piece into a baguette or bun. You can press it into shape OR push it lightly with your fingers into a rectangle and then roll it up, but you want to preserve some air pockets.
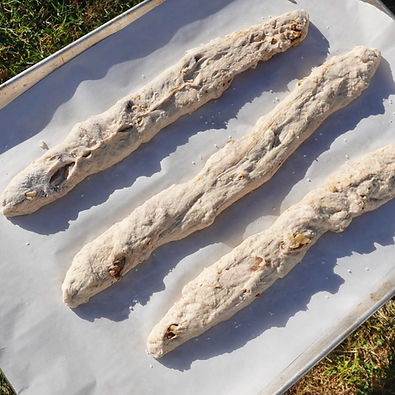
Hold the baking sheet horizontal below the counter and scrape and roll 1 baguette or 2 buns onto it. Turn your pan around. Scrape and roll the other 2 breads onto the other side of the pan. (Later you can use the scraper to clean off any dough from the counter.) Now refine the bread shapes in the pan: rectangular for 4 hero buns or cute pointed ends for baguettes. This is a low-salt recipe; if you like salt, sprinkle the tops lightly with rock salt.
Bake: 30 minutes.
Variations: Add chopped walnuts or pitted sliced green olives to the dough. (Be generous with the walnuts: a fan of French walnut bread will count the number of walnut bits per centimeter.)


Lazy Mushrooms
When I was living in a university residence, the food was dull and I had limited access to a kitchen. For midnight snacks, I bought mushrooms, butter, and popcorn (several dubious food groups). I ate the mushrooms, fried in butter, and I made buttered popcorn. For a treat, I went to the best restaurant downtown for lunch and ordered only their mushroom salad on lettuce and a glass of wine. Now, to hunt for wild mushrooms, I need to forage with an expert, so ordinarily I buy market mushrooms. I’ve realized that they don’t need to be sautéed in butter or oil because they contain so much water and their flavour intensifies with slow cooking. I slice them, shake them up with spices and herbs, and put them in the oven. Mushrooms cooked this way are good in a salad or folded inside an omelet or piled in a mushroom quesadilla or mixed with a cooked grain (bulgur, quinoa, wheat berries, kasha, or risotto.). No mushy mushrooms for the fastidious eater. Save the paper bag you had your mushrooms in.
lazy instructions:
Preheat the oven to 350 and prep 1 or 2 baking sheets with parchment paper. Have more mushrooms than you think you need - 10-12 medium-large white or brown mushrooms for two people. Rinse them off, and there’s no need to dry them. Cut each one into 5-7 slices.
In a small bowl, prepare the spice and herb mixture. All of them must be ground (as any bits or leaves would burn) and you can fling in 2 teaspoons or so of each. Good choices: cumin, oregano, smoked paprika, salt, pepper, garlic powder, rosemary, thyme. Use whatever you like, and if you like spicy, start with ½ teaspoon of chili powder.
Open a clean paper bag – the one you got with the mushrooms or a lunch bag. Pour half the mixture in, then cram in half the sliced mushrooms. Roll the top over to seal it, hold it horizontally with both hands, and shake, shake, shake. The mushrooms are picking up the spices and herbs – no oil needed. Spread them out on the baking sheet. Shake the rest of the mushrooms with the remaining mixture, and spread them out. Bake them for a while. They’ll start by getting rid of their water, and then they’ll roast. Check on them. You can flip them over, or not – be lazy. You can eat them when they’re still tender, or a bit crisped: they can stay in the oven for up to 30 minutes. Enjoy.


The lovely ceramics were created by Alison Meyer.
Albion Cookies (vegan)
On the opening of Albion Books in Vancouver in 1985, customers received a coupon for a Free Albion Cookie. Those were traditional homemade oatmeal chocolate chip cookies. After a good run of 37 years, Albion Books closed in 2022. I decided that, with changing tastes, it would be good to bake the same cookies but vegan. Customers and friends invited to the closing party of the wonderful Albion Books received these very (vegan) Albion Cookies. Here’s a bit of Vancouver history you can really taste.
2 ½ cups rolled oats
¾ cup coconut oil or veggie butter
¾ cup cane sugar or coconut sugar
½ large ripe banana or ¼ cup applesauce
¼ cup nondairy milk
1 ½ cups flour
1 tblsp. cinnamon
1 tsp. baking soda
pinch of salt
3/4 cup chopped dark chocolate bits or chips
(If you don't eat chocolate, substitute raisins)
Preheat oven to 350. Pulverize in blender or processor 1 cup of the oats (leave the remaining 1 ½ cups whole). Cream oil & sugar well with mixer. Add banana or applesauce and milk. You’ll get a creamy texture. Add in flour, blitzed oats, cinnamon, baking soda, & salt. Add in the remaining oats. Stir in chocolate chips or bits. Scoop out balls bigger than a walnut and flatten on a parchment-covered baking sheet. Bake 15-16 minutes for big cookies. Yield: at least 24, and they keep well in the fridge or freezer.


Spicy Rye Buns (Heart-shaped)
If you like dark caraway rye bread, you’ll like these. I experimented to produce buns full of rich flavour and spice. Coffee adds depth and loft. The interior of these buns is dense but not cloying. All the spices are better ground, but if you don’t have a spice grinder to grind the caraway seeds, use whole ones. It’s easy to make heart-shaped buns – no cookie-cutter needed. I’ll tell you how.
What to spread on buns with such a complex flavour of their own? Most people would like a generous layer of butter or cream cheese on the split buns. For a different texture on top, you could add sliced apple, pear, or banana.
3 cups unbleached white flour
1 cup rye flour
2 tsp. instant dry yeast
SPICES: 1 tsp. ground cardamon, 1 tsp. ground caraway seeds, 1 tsp. ground anise seeds, ½ tsp. ground cloves
½ tsp. salt
1 tblsp. oil
1 tblsp. molasses
¼ cup honey
1 cup warm coffee or water or a combo, plus more as needed
If you are using coffee, make it and let it cool to room temperature. Combine dry ingredients in a big bowl. In another bowl combine oil, molasses, honey, and 1 cup coffee or water or a combo. Add the wet to the dry and stir well. Now ready ¼ cup more water, and add as much additional water needed to make a smooth dough, as you gather it together. Knead it for a few minutes. Place in an oiled bowl, cover it with plastic wrap, and let it rise 2 hours.
Roll the dough into a thick tube. Cut it into 7 equal pucks. Now you roll or mash each puck into a thick circle.
If you want heart-shaped buns, here’s how: Make 3 cuts in the bun: First, cut a V out of the top. Second, cut a diagonal across the left bottom of the circle to narrow it. Third, cut a diagonal across the right bottom to make the lower point. Save the cuts. Use them to make the last bun. Add the last cut-off bits to the underside of the last bun. Space the buns on one parchment-lined baking sheet. Cover and let rise about one hour.
Preheat oven to 400. Slide the buns in and bake about 15 minutes. When cool, they’re easy to cut in half horizontally.